
A vacuum sealer can look like a simple machine.
Put the bag inside, remove the air, seal it, and you are done.
In a busy commercial kitchen, however, things are not always that simple. Staff may use the machine dozens of times in a day. Products can be wet, dry, soft, large, or small. The machine also needs regular cleaning because food packaging creates its own mess.
Disclosure: As an Amazon Associate I earn from qualifying purchases. Read our Amazon Affiliate Disclosure for more information.
That is why many businesses look for a commercial vacuum sealer with stainless steel chamber.
A stainless steel chamber can offer a strong and practical working surface for commercial food packaging. It can also make cleaning easier when the machine has a suitable design and smooth accessible surfaces.
But the chamber material is only one part of the decision.
You still need to consider chamber size, pump performance, seal-bar length, cycle time, bag compatibility, cleaning, maintenance, and the workload of your business.
Here is a practical step-by-step guide to choosing and using one.
1. Start With Your Business
Before looking at machines, look at your business.
Ask a few basic questions.
What products do you package?
How many bags do you seal each day?
How large are the products?
Do you package liquids?
Do you work with meat?
Do you prepare food in batches?
Do you need the machine during busy service hours?
Your answers will help you choose the right size and type.
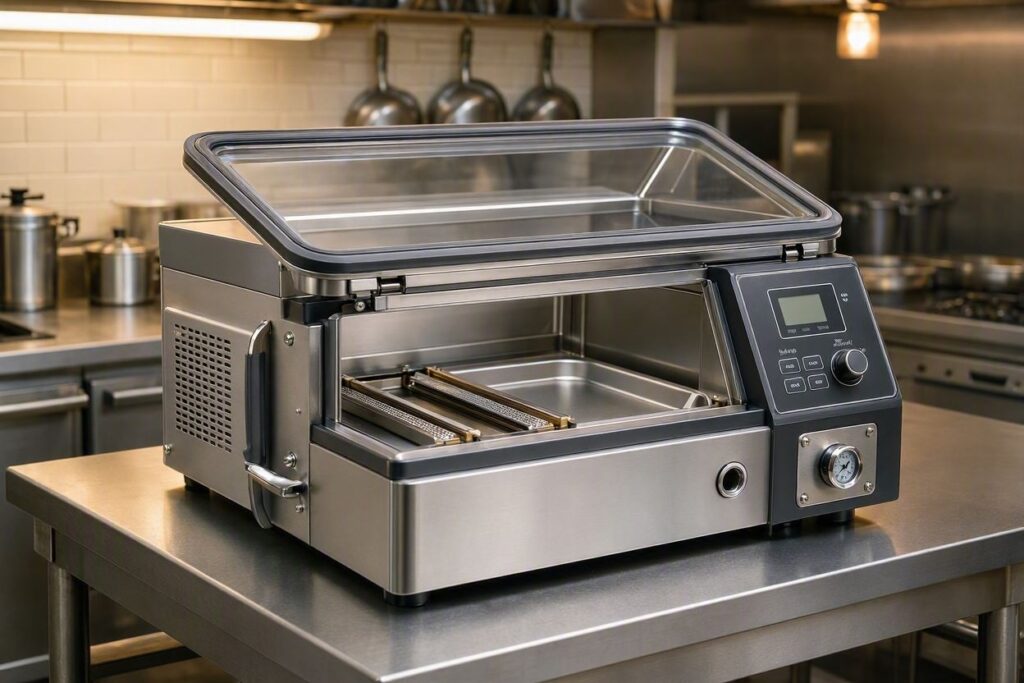
2. Understand the Stainless Steel Chamber
The chamber is the area where you place the vacuum bag during the vacuum cycle.
A stainless steel chamber provides a durable working surface and can suit commercial food environments.
It also gives the machine a professional commercial feel.
But do not choose a machine simply because the product listing says “stainless steel.”
Check what parts actually use stainless steel.
Look at the chamber, exterior panels, lid, sealing area, and other components.
3. Check the Chamber Size
Chamber size may matter more than the outside appearance of the machine.
Measure your largest regular package.
Check:
- Length
- Width
- Height
Then compare those measurements with the usable chamber space.
Your product needs to fit comfortably.
4. Consider the Product Thickness
A thin steak and a thick roast do not require the same amount of space.
If your business packages large cuts of meat, thick prepared foods, or large portions, check the chamber height carefully.
Do not assume that a wide chamber automatically has enough vertical space.
5. Count Your Daily Packages
Next, estimate your daily production.
For example, a small food business might package 30 bags per day.
A busy commercial kitchen might package several hundred.
The machine should match your workload.
Check the manufacturer’s duty-cycle recommendations before making a purchase.
6. Think About Future Growth
Your business may grow.
If you currently seal 40 bags per day, you may eventually seal 80 or 100.
Choose equipment with some reasonable capacity for growth.
However, do not buy an oversized industrial machine if your business has no practical need for it.
You still need to consider cost, space, electricity, and maintenance.
7. Decide What You Will Package
Make a product list.
You may package:
- Beef
- Chicken
- Fish
- Cheese
- Vegetables
- Prepared meals
- Coffee
- Dry ingredients
- Frozen foods
- Sauces
- Marinades
Different products can create different packaging challenges.
8. Think About Moist Foods
Moisture can cause problems during vacuum sealing.
When the machine removes air, liquid can move toward the bag opening.
If liquid reaches the sealing area, it can affect the seal.
Chamber vacuum machines can be useful for many moist-food applications because they remove air from the chamber and bag rather than using the same external suction process.
Still, always follow the manufacturer’s instructions.
9. Check the Seal Bar
The seal bar creates the final closure.
Check its length.
If you use large bags, make sure the seal bar can handle their width.
For smaller packages, you may not need a very wide seal bar.
Choose the size that matches your regular bags.
10. Look at the Sealing System
Some machines create a single seal.
Others offer double-seal configurations.
If package closure is a major concern for your business, compare the sealing system carefully.
Look at the number of sealing lines, seal width, seal time, and available adjustments.
11. Choose Compatible Bags
Your machine needs the right bags.
Many chamber vacuum sealers use smooth vacuum pouches.
External suction machines often use textured bags that allow air to move through the bag toward the vacuum system.
Before buying a machine, check which bags it requires.
12. Compare Bag Thickness
Bag thickness affects performance.
Thin bags may suit some applications.
Thicker bags may make more sense for products that require extra puncture resistance.
For example, bone-in meat can create sharp points that damage packaging.
Choose the bag according to the product and manufacturer’s recommendations.
13. Check the Vacuum Pump
The pump handles the air-removal process.
Compare the manufacturer’s specifications.
Look at:
- Pump type
- Pump capacity
- Vacuum level
- Maintenance requirements
- Expected cycle time
Pump capacity works together with chamber size, product size, bag size, and machine design.
14. Compare Cycle Times
A commercial business needs practical speed.
Suppose you need to package 150 bags before shipping.
A slow cycle can add a lot of extra time.
Compare the complete cycle rather than looking only at vacuum speed.
The cycle can include:
- Vacuuming
- Sealing
- Cooling
- Chamber release
Choose a machine that fits your production schedule.
15. Check the Duty Cycle
Duty cycle tells you how much repeated operation the machine can handle according to the manufacturer’s guidance.
This matters for commercial use.
If employees run the machine repeatedly throughout the day, check the recommended operating pattern.
Do not assume that every stainless-steel chamber machine can run continuously.
16. Measure Your Workspace
Commercial kitchens often have limited space.
Measure the location where you plan to install the machine.
Check:
- Width
- Depth
- Height
- Lid clearance
- Operator space
The machine should fit comfortably.
Employees should not have to squeeze around it.
17. Check Electrical Requirements
Look at the machine’s electrical specifications.
Check:
- Voltage
- Power requirements
- Plug type
- Electrical load
Make sure your workspace can support the machine safely.
If you are unsure, consult the manufacturer or a qualified electrician.
18. Prepare Your Products
Before using the machine, prepare the food properly.
Portion the product.
Remove unnecessary wrapping.
Trim sharp edges where appropriate.
Check for bones or hard objects that may puncture the bag.
Keep food at the appropriate temperature during handling.
19. Select the Correct Bag Size
The bag should fit the product.
Do not force a large product into a small bag.
At the same time, avoid using an unnecessarily large bag for every small portion.
Standard bag sizes can make your packaging process easier.
20. Fill the Bag Correctly
Place the product inside the bag.
Leave enough space at the opening for sealing.
Do not overfill the pouch.
Keep the product away from the area where the machine will create the seal.
21. Keep the Opening Clean
This step deserves attention.
Keep the bag opening free from:
- Meat juices
- Sauce
- Oil
- Grease
- Crumbs
- Food particles
A dirty sealing area can cause problems.
If necessary, use a fresh bag.
22. Place the Bag Inside the Chamber
Follow the machine’s instructions.
Position the bag opening correctly.
Keep the opening flat.
Remove large wrinkles.
Make sure the product sits in a suitable position.
Close the lid properly.
23. Select the Vacuum Setting
Choose a vacuum setting suitable for the product.
Do not automatically choose the highest setting.
A firm product may tolerate stronger vacuum pressure.
A delicate product may need a different approach.
Test the setting first.
24. Set the Sealing Time
Sealing time depends on the bag material and thickness.
Start with the manufacturer’s recommended setting.
Run a test.
Inspect the seal.
If you change the bag material, test again.
25. Run a Test Package
Never start a large commercial order without testing.
Use the same product.
Use the same bag.
Use the intended settings.
Run several cycles.
Inspect the finished packages.
This simple test can prevent a large amount of packaging waste.
26. Inspect the Finished Seal
Look closely at the sealing line.
Check for:
- Gaps
- Wrinkles
- Weak sections
- Burn marks
- Food trapped inside the seal
- Uneven sealing
If you find a problem, stop and investigate.
27. Check for Air Pockets
After sealing, inspect the package.
If you still see large pockets of air, check the vacuum process.
The problem could involve:
- Bag positioning
- Bag size
- Product shape
- Machine settings
- Bag quality
- Gasket condition
Do not assume the machine itself has failed.
28. Use the Stainless Steel Surface Properly
Stainless steel makes a good commercial working surface, but it still needs proper care.
Do not use abrasive cleaning methods unless the manufacturer specifically approves them.
Follow the manufacturer’s cleaning instructions.
29. Clean the Chamber Regularly
Food packaging can leave moisture and residue inside the chamber.
Clean it according to the manufacturer’s instructions.
Pay attention to:
- Chamber floor
- Chamber walls
- Seal bar
- Gasket
- Other food-contact areas
Do not allow residue to build up.
30. Clean After Messy Products
If you package meat, marinades, or wet foods, clean the machine after the appropriate production period.
Do not allow juices or sauce to remain inside the chamber.
Quick cleaning makes later cleaning easier.
31. Inspect the Lid
The lid needs to close properly.
Check it regularly.
Look for:
- Cracks
- Damage
- Loose components
- Dirt
- Seal problems
If the lid does not close correctly, follow the manufacturer’s troubleshooting instructions.
32. Inspect the Chamber Gasket
The gasket helps create the chamber seal.
Check it regularly.
Look for:
- Cuts
- Cracks
- Flattened areas
- Dirt
- Visible wear
A damaged gasket can reduce vacuum performance.
Replace it according to the manufacturer’s instructions.
33. Check the Seal Bar
Inspect the sealing area.
Look for residue or damage.
If seals suddenly become weak, check the sealing system.
The problem may involve the bag, settings, or sealing components.
34. Maintain the Pump
Pump maintenance depends on the machine.
Some vacuum pumps require oil changes.
Others use different maintenance systems.
Follow the manufacturer’s service schedule.
Do not guess about pump maintenance.
35. Listen for Unusual Noises
You will learn how your machine normally sounds.
Pay attention when that sound changes.
A strange noise or unusual vibration may indicate a problem.
Stop and check the manufacturer’s troubleshooting instructions if something seems wrong.
36. Watch the Cycle Time
A change in cycle time can tell you something.
If the machine suddenly takes much longer to complete a normal cycle, investigate.
Possible causes can include:
- Gasket problems
- Bag problems
- Incorrect settings
- Pump issues
- Other maintenance needs
37. Train Your Employees
A commercial machine should not depend on one experienced operator.
Train everyone who uses it.
Teach them to:
- Prepare the product.
- Choose the correct bag.
- Fill the bag.
- Keep the opening clean.
- Position the bag.
- Select the settings.
- Start the cycle.
- Inspect the seal.
- Label the package.
- Store it correctly.
38. Create a Product Settings Chart
If you package many products, create a simple settings sheet.
For example:
Beef: Approved bag + tested vacuum setting + tested seal setting
Chicken: Approved bag + tested vacuum setting + tested seal setting
Vegetables: Approved bag + tested vacuum setting + tested seal setting
Use settings that you have tested on your actual machine.
39. Label Every Package
After sealing, label the package.
Depending on your product and applicable requirements, labels may include:
- Product name
- Packaging date
- Batch information
- Storage instructions
- Use-by information
- Other required details
Clear labels make inventory management easier.
40. Store Products Correctly
Vacuum sealing does not replace refrigeration or freezing.
Keep products at the required temperature.
Follow your food-safety procedures.
Do not assume that removing air makes a product safe to keep at room temperature.
41. Organize Your Storage Area
Arrange finished packages in a clear system.
Group similar products together.
Keep labels visible.
Follow your stock-rotation method.
A well-organized storage area saves time.
42. Keep Bags Organized
Store vacuum bags in a clean and dry place.
Separate different sizes.
Label boxes if needed.
Keep frequently used sizes close to the machine.
43. Track Bag Consumption
Record how many bags your business uses each week.
This helps you estimate monthly costs.
It also helps you identify unnecessary waste.
If employees frequently throw away bags because of failed seals or punctures, investigate the reason.
44. Check Replacement Parts
Ask about replacement parts before buying the machine.
Find out whether the supplier provides:
- Gaskets
- Seal components
- Pump parts
- Hinges
- Other service parts
Parts availability can affect long-term equipment ownership. (pantrygearlab.com)
45. Read the Warranty
A warranty gives you some protection, but you need to understand its terms.
Check:
- Warranty period
- Covered components
- Repair process
- Service location
- Labor coverage
- Replacement policy
Ask questions before purchasing.
46. Check Technical Support
A commercial business needs help when equipment stops working.
Ask the supplier about:
- Technical support
- Repairs
- Replacement parts
- Service centers
- Warranty claims
Reliable support can save you from unnecessary downtime.
47. Think About Long-Term Costs
Do not calculate only the purchase price.
Consider:
- Machine cost
- Bags
- Electricity
- Maintenance
- Replacement parts
- Repairs
- Cleaning supplies
- Employee time
- Downtime
This gives you a more realistic cost estimate.
48. Do Not Choose Only by Stainless Steel
Stainless steel sounds attractive.
It looks professional.
It can work well in commercial food environments.
But the chamber material does not tell you everything about the machine.
Also compare:
- Pump
- Chamber size
- Seal bar
- Cycle time
- Duty cycle
- Controls
- Maintenance
- Warranty
- Parts availability
The complete machine matters.
49. Test Before Buying
If the supplier offers a demonstration or test, take advantage of it.
Use your actual product.
Use your intended bags.
Try small portions.
Try large portions.
Test moist products if relevant.
Check the seal.
Watch the cycle.
See how easy the machine is to clean.
This gives you much better information than looking at photographs.
50. Build a Simple Daily Workflow
Once you buy the machine, create a standard process.
A practical workflow can look like this:
Prepare → Portion → Bag → Chamber → Vacuum → Seal → Inspect → Label → Store
Keep the same basic sequence every day.
It makes training easier.
It also reduces unnecessary mistakes.
Who Can Benefit From a Stainless Steel Chamber Vacuum Sealer?
This type of machine may suit:
- Restaurants
- Butcher shops
- Catering companies
- Meal-prep businesses
- Food manufacturers
- Specialty food businesses
- Small food producers
- Commercial kitchens
- Food packaging operations
The right size depends on production volume and product dimensions.
Common Mistakes to Avoid
Avoid these problems:
- Buying a machine without measuring the chamber
- Ignoring seal-bar width
- Using incompatible bags
- Overfilling bags
- Allowing food into the sealing area
- Ignoring bag punctures
- Choosing equipment based only on stainless-steel construction
- Ignoring duty-cycle specifications
- Skipping maintenance
- Ignoring gasket damage
- Forgetting to check replacement parts
- Buying without checking electrical requirements
- Choosing only by price
A good machine still needs proper operation.
A Quick Buying Checklist
Before buying a commercial vacuum sealer with stainless steel chamber, check the following:
Chamber: Is the usable space large enough?
Construction: Does the machine use suitable commercial-grade materials?
Seal bar: Can it handle your normal bag widths?
Pump: Does it match your workload?
Cycle: Can it handle your production schedule?
Duty cycle: Does the manufacturer support your expected usage?
Bags: Can you easily source compatible bags?
Cleaning: Can employees clean the chamber properly?
Maintenance: Are routine service requirements clear?
Parts: Are replacement parts available?
Warranty: What exactly does it cover?
Support: Can you get technical assistance?
Power: Does your workspace meet the electrical requirements?
A commercial vacuum sealer with stainless steel chamber can be a practical investment for a food business that needs reliable and repeatable packaging.
But do not choose it simply because the chamber looks strong or the machine has a stainless-steel exterior.
Start with your products.
Measure your largest package.
Calculate your daily workload.
Check the chamber dimensions.
Compare the seal-bar length.
Look at pump specifications, cycle time, and duty cycle.
Then check bag compatibility, cleaning, maintenance, replacement parts, warranty, technical support, and electrical requirements.
If you package wet foods, meat, marinades, or other products that create moisture, pay extra attention to the machine’s suitability for those applications.
Before full production, test the machine with your actual products and bags.
Once everything works properly, keep the process simple:
Prepare → Portion → Bag → Vacuum → Seal → Inspect → Label → Store
Train every operator to follow the same steps.
Keep the stainless steel chamber clean.
Inspect the gasket.
Check the seal bar.
Maintain the pump according to the manufacturer’s instructions.
And continue following the food-safety, refrigeration, freezing, sanitation, and labeling requirements that apply to your business.
The stainless steel chamber can be an important feature, but it should never be the only reason you buy a vacuum sealer. The best machine is the one that fits your products, workload, workspace, packaging materials, and long-term operating needs.
Content Disclaimer: Content on Vacuum Seal HQ is provided for general informational and educational purposes only. While we aim to provide accurate and up-to-date information, errors or omissions may occur. Always check product instructions, manufacturer guidance and other appropriate sources before relying on the information provided.