A vacuum sealer does two jobs at the same time.
First, it removes air from a bag.
Second, it closes the bag with heat.
For a busy business, the quality of that final seal matters just as much as the vacuum itself. A package can have very little air inside, but if the seal does not hold, the whole packaging job becomes a waste of time.
That is one reason many businesses look at a commercial vacuum sealer with double seal.
Disclosure: As an Amazon Associate I earn from qualifying purchases. Read our Amazon Affiliate Disclosure for more information.
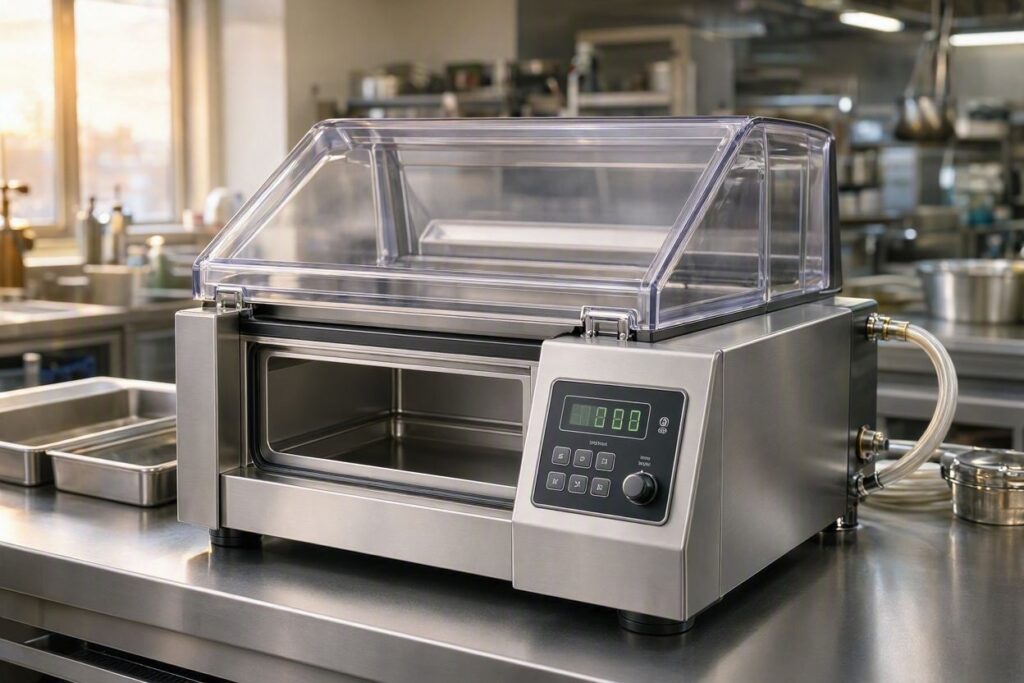
A double-seal machine creates two sealing lines across the bag opening. This gives the package an additional sealed area and can provide extra protection against a single weak sealing line.
Restaurants, butcher shops, food producers, catering businesses, meal-prep companies, and other commercial operations may find this feature useful.
However, a double seal does not mean you can ignore bag quality, machine settings, food handling, or storage practices.
The machine still needs to match your workload.
Here is a practical step-by-step guide.
1. Understand What a Double Seal Means
A double seal simply means the machine creates two separate heat-sealed lines instead of one.
Imagine the opening of your vacuum bag.
A single-seal machine creates one line across that opening.
A double-seal machine creates two.
The second line provides another sealed barrier.
This can be especially useful for commercial packaging where businesses want a more secure closure.
2. Look at Your Current Packaging Needs
Before buying anything, examine your current packaging process.
Ask yourself:
- How many bags do I seal each day?
- What products do I package?
- How large are my bags?
- Do I package wet foods?
- Do I package meat?
- Do I handle large portions?
- Do I ship packaged products?
- How much counter space do I have?
Your answers will help you decide whether you actually need a double-seal machine.
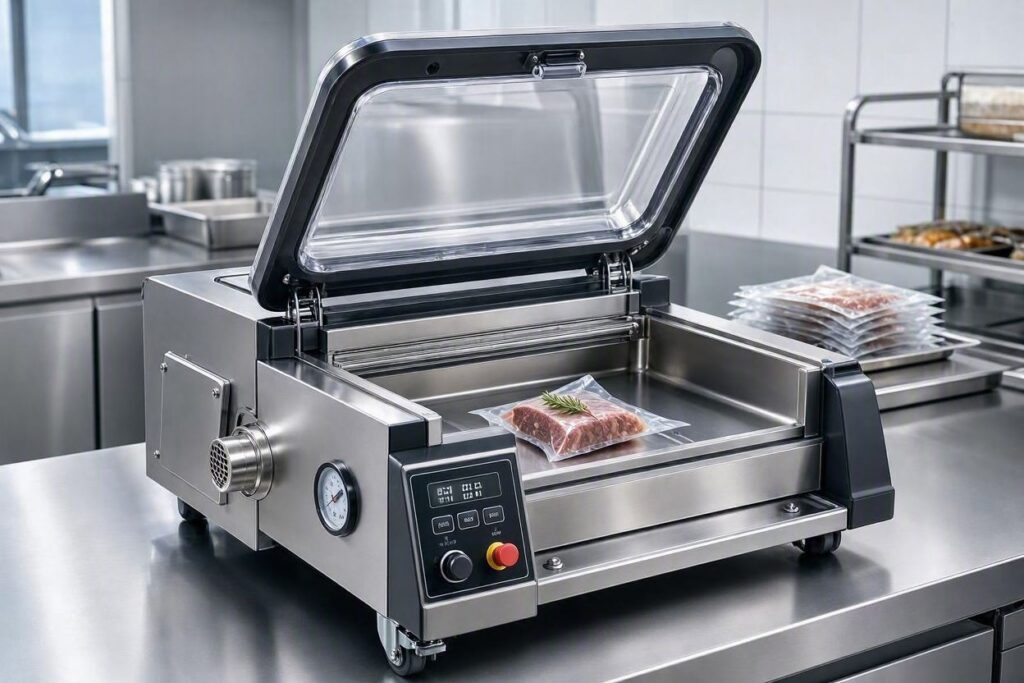
3. Decide What You Will Package
Different businesses package different products.
You may package:
- Beef
- Chicken
- Fish
- Cheese
- Vegetables
- Prepared meals
- Coffee
- Dry foods
- Frozen products
- Snacks
- Ingredients
Make a list of your main products.
Then choose equipment around those products.
4. Calculate Your Daily Bag Volume
Count your average daily packages.
Maybe you seal 25 bags per day.
Maybe you seal 200.
The difference matters.
A machine that works well for occasional packaging may struggle with constant commercial use.
Look at the manufacturer’s duty-cycle recommendations.
Do not assume that every machine advertised as “commercial” can run continuously.
5. Check the Double-Seal Configuration
Not every machine uses the same double-seal arrangement.
Some machines place two sealing lines close together.
Others may offer different spacing or sealing controls.
Check the actual specifications.
Look at the seal-bar design and the distance between the two sealing lines.
This matters if your bags have limited opening space.
6. Measure Your Bags
Bag size affects machine selection.
Measure the bags you currently use.
Check:
- Width
- Length
- Thickness
- Material
Then compare those measurements with the machine’s sealing capacity.
Do not buy a machine first and hope your existing bags will fit.
7. Check the Seal-Bar Length
The seal bar determines how wide a bag opening the machine can handle.
If your business uses large bags, you may need a wider seal bar.
If you package small portions, a smaller sealing area may work perfectly well.
Choose according to your normal packaging sizes.
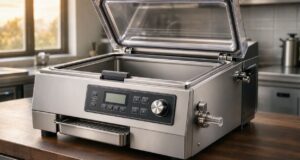
8. Consider a Chamber Vacuum Sealer
A chamber vacuum sealer places the entire bag inside a chamber during the vacuum process.
This design can work well for many commercial applications.
It can also make sense for businesses that package moist products or foods containing liquids because the vacuum process works differently from external suction systems.
If you frequently package sauces, marinades, or wet ingredients, compare chamber models carefully.
9. Think About Wet Products
Liquid creates a common packaging problem.
During vacuuming, liquid can move toward the bag opening.
If liquid reaches the sealing area, it can affect the quality of the seal.
Keep the opening clean.
For liquid-heavy products, use equipment and settings that the manufacturer approves for that application.
10. Choose the Correct Bag Material
Your machine needs compatible bags.
Chamber vacuum sealers commonly use smooth vacuum pouches.
Many external suction machines require textured or embossed bags that help air move through the bag toward the vacuum channel.
Always check the manufacturer’s recommendations.
11. Check Bag Thickness
Double sealing does not fix a poor-quality bag.
The bag still needs to withstand the packaging process and normal handling.
Compare the bag thickness with your product.
For products with sharp edges or bones, consider whether your chosen bag provides enough puncture resistance for the application.
12. Prepare the Product
Good packaging starts before the bag enters the machine.
Prepare the product properly.
Remove unnecessary packaging.
Portion the food.
Trim sharp edges where appropriate.
Check for objects that could puncture the bag.
Keep the product at the appropriate temperature during handling.
13. Keep the Bag Opening Clean
This small detail can make a big difference.
Do not allow:
- Meat juices
- Oil
- Sauce
- Crumbs
- Grease
- Food particles
to collect around the opening.
The sealing area needs to remain clean.
If the opening becomes dirty, use a clean bag or clean the appropriate area before sealing.
14. Fill the Bag Correctly
Do not overfill.
Leave enough empty space at the opening for the machine to create the double seal.
The product should sit comfortably inside the bag.
If the bag is too full, the sealing process becomes more difficult.
15. Position the Bag
Place the bag according to the machine’s instructions.
Keep the opening flat.
Avoid large wrinkles.
Make sure the sealing area sits correctly on the seal bar.
Correct positioning helps both sealing lines form properly.
16. Select the Vacuum Setting
Many commercial machines offer adjustable vacuum settings.
Choose a setting suitable for the product.
Do not automatically use maximum vacuum.
Hard products may tolerate stronger vacuum pressure.
Delicate products may need more careful handling.
Test your settings before full production.
17. Set the Seal Time
Seal time depends on the bag material and thickness.
Start with the manufacturer’s recommended setting.
Run a test package.
Inspect both sealing lines.
If you change the bag material or thickness, test again.
18. Run the First Test
Before processing a large order, run a few test bags.
Use the same bags you plan to use during production.
Use the actual product.
Run the complete vacuum and sealing cycle.
Then inspect the result.
19. Check Both Seals
A double-seal package has two sealing lines.
Check both.
Look for:
- Gaps
- Weak sections
- Wrinkles
- Burn marks
- Food trapped in the seal
- Uneven sealing
Both lines should form correctly.
20. Perform a Simple Seal Check
After the package cools, inspect the sealed area.
Look for obvious openings or incomplete sections.
If your business requires formal package testing, follow your internal quality-control procedure.
Do not assume that two lines automatically guarantee a perfect package.
21. Use Double Sealing for Added Protection
The main advantage of a double seal comes from redundancy.
If one sealing line develops a problem, the second line may provide another barrier.
This can be useful for commercial operations that need consistent package closure.
However, the second seal does not replace proper packaging practices.
22. Do Not Confuse Double Seal With Double Vacuum
These terms are different.
A double seal means two sealing lines.
A double vacuum would refer to a different vacuum process or cycle.
When shopping, read the machine specifications carefully.
Make sure the feature you want actually refers to two heat-sealing lines.
23. Think About Production Speed
Commercial businesses need practical cycle times.
If your team seals hundreds of bags each day, even small delays add up.
Compare:
- Vacuum time
- Seal time
- Cooling time
- Overall cycle time
Choose a machine that fits your production needs.
24. Check the Duty Cycle
Read the manufacturer’s duty-cycle information.
If your team operates the machine repeatedly, the equipment needs to support that workload.
Do not assume that a machine can run without breaks.
Follow the manufacturer’s operating recommendations.
25. Look at Pump Specifications
The pump controls the vacuum process.
Compare:
- Pump type
- Pump capacity
- Vacuum specification
- Maintenance requirements
Pump capacity works together with chamber size, bag size, product type, and machine design.
26. Consider Chamber Size
If you choose a chamber model, look at the usable chamber space.
A larger chamber can accommodate larger products or multiple smaller packages, depending on the machine design and manufacturer’s instructions.
Measure your largest regular package.
Then compare it with the chamber dimensions.
27. Think About Multiple Bags
Some commercial machines can process more than one suitable bag per cycle.
If your workflow involves several small packages, this can improve productivity.
But never overload the chamber.
Follow the machine’s instructions regarding bag placement and quantity.
28. Create Standard Portions
Standard portions make packaging easier.
For example, a business might use:
- 250 g portions
- 500 g portions
- 1 kg portions
- Family-size packages
Use the sizes that make sense for your business.
Then select bags that fit those portions.
29. Label Every Package
Once you seal the product, label it.
Depending on your business and applicable requirements, labels may include:
- Product name
- Packaging date
- Batch number
- Storage information
- Use-by information
- Other required information
Good labeling makes inventory management much easier.
30. Store the Packages Properly
Vacuum sealing does not replace refrigeration or freezing.
If the product needs refrigeration, keep it refrigerated.
If it requires freezing, freeze it.
Follow applicable food-safety requirements for your product and operation.
Do not treat vacuum packaging as a substitute for proper temperature control.
31. Keep the Packaging Area Clean
The vacuum sealer should sit in a clean, organized area.
Keep bags away from unnecessary contamination.
Keep labels and packaging supplies organized.
Clean the equipment according to the manufacturer’s instructions.
32. Clean the Sealing Area
Food residue can build up around the seal bar and surrounding areas.
Clean the equipment regularly.
Pay attention to:
- Seal bar
- Chamber
- Gasket
- Interior surfaces
- Exterior surfaces
Follow the manufacturer’s cleaning instructions.
33. Inspect the Sealing Bar
The seal bar plays a major role in creating the package closure.
Inspect it regularly.
Look for:
- Damage
- Excess residue
- Wear
- Uneven areas
If you notice repeated sealing problems, investigate the sealing system.
34. Check the Gasket
If your machine uses a chamber gasket, inspect it regularly.
Look for:
- Cuts
- Cracks
- Flattened sections
- Dirt
- Visible damage
A damaged gasket can affect vacuum performance.
35. Maintain the Pump
Different machines use different pump designs.
Some require oil maintenance.
Others use different pump systems.
Follow the manufacturer’s maintenance schedule.
Do not guess about oil changes or pump servicing.
36. Watch for Changes in Performance
You will learn how the machine normally operates.
Pay attention if something changes.
For example:
- The vacuum takes longer.
- The seals look different.
- The machine makes unusual sounds.
- The pump runs differently.
- Packages lose vacuum quickly.
Investigate the cause.
37. Check the Bag if the Seal Fails
Do not immediately blame the machine.
Look at the bag first.
Check whether:
- The bag has a hole.
- The opening has wrinkles.
- Food entered the sealing area.
- The bag material matches the machine.
- The bag thickness matches the settings.
Many sealing problems start with the packaging material.
38. Check the Seal Time if Needed
If the bag looks fine but the seal remains weak, review the seal settings.
The sealing time may not match the bag material.
Follow the manufacturer’s recommended settings.
Make small adjustments and test again.
39. Avoid Excessive Heat
More heat does not always mean a better seal.
Too much heat can damage some bags or create poor-looking seals.
Use the correct setting for the packaging material.
Test before production.
40. Keep the Two Seals Straight
When the bag enters the machine, keep it properly aligned.
If the opening shifts during sealing, the two lines may not form as expected.
Straight positioning makes inspection easier too.
41. Train Your Employees
Do not let every employee develop a different packaging method.
Create one standard process.
Teach employees to:
- Prepare the product.
- Select the correct bag.
- Fill the bag.
- Keep the opening clean.
- Position the bag.
- Select the vacuum setting.
- Set the seal time.
- Start the cycle.
- Check both seals.
- Label the package.
- Store it correctly.
42. Create a Settings Chart
If you package different products, record tested settings.
For example:
Product: Beef
Bag: Approved size
Vacuum: Tested setting
Seal: Tested double-seal setting
Create similar entries for your other products.
This reduces guesswork.
43. Keep Bags Organized
Store bags in a clean, dry area.
Separate different sizes.
Label boxes if needed.
Keep common sizes close to the vacuum sealer.
A simple storage system saves time.
44. Track Bag Consumption
Double sealing uses the same basic bag but creates two sealing lines.
Track how many bags your business uses.
This helps you forecast packaging costs.
It also helps you identify unnecessary waste.
45. Compare the Cost of Bags
Do not look only at the machine price.
Calculate the cost of your regular bags.
Then estimate monthly usage.
A machine that looks affordable can become expensive if it requires costly bags.
46. Check Replacement Parts
Ask the supplier about replacement parts before buying.
Find out whether you can obtain:
- Gaskets
- Sealing components
- Pump parts
- Hinges
- Other service parts
Parts availability can affect long-term equipment reliability.
47. Check the Warranty
Read the warranty carefully.
Find out what it covers.
Ask how warranty repairs work.
Also check whether the supplier offers technical support.
48. Consider Your Available Power
Check the machine’s electrical requirements.
Look at:
- Voltage
- Power consumption
- Plug type
- Electrical load
Make sure your workspace can safely support the machine.
If you have questions, ask the manufacturer or a qualified electrician.
49. Think About Noise and Workspace
A commercial kitchen can already be loud.
If possible, check the machine’s operating noise.
Also consider where you will place it.
The operator needs enough room to work comfortably.
50. Test Before You Buy
If a supplier allows testing, use it.
Bring or request samples of the bags you intend to use.
Test your actual product.
Try small portions.
Try large portions.
Try moist products if relevant.
Then inspect both seals.
A real test tells you much more than a product photograph.
When Does a Double Seal Make Sense?
A double-seal vacuum machine can make sense when your business wants an additional sealing line for its packaging process.
It may be useful for:
- Meat packaging
- Restaurant preparation
- Catering
- Meal preparation
- Food production
- Specialty food packaging
- High-volume commercial packaging
The actual benefit depends on your products, bags, machine settings, and workflow.
Common Mistakes to Avoid
Avoid these common mistakes:
- Buying a machine without checking bag compatibility
- Choosing a seal bar that is too narrow
- Ignoring chamber dimensions
- Overfilling bags
- Allowing food into the sealing area
- Using excessive heat
- Ignoring weak seals
- Skipping cleaning
- Ignoring gasket damage
- Assuming double sealing solves every packaging problem
- Buying equipment without checking duty-cycle information
- Choosing a machine only because it has a low price
A double seal helps, but good packaging still requires good technique.
Final Buying Checklist
Before purchasing a commercial vacuum sealer with double seal, check these points:
Double-seal design: Does the machine actually create two sealing lines?
Seal-bar length: Can it handle your bags?
Bag compatibility: Are suitable bags easy to source?
Chamber size: Can it fit your largest product?
Pump: Does the vacuum system suit your workload?
Cycle time: Can it keep up with production?
Duty cycle: Can it handle repeated operation?
Controls: Can employees use them easily?
Cleaning: Can staff clean the machine properly?
Maintenance: Are routine service requirements reasonable?
Parts: Can you obtain replacement components?
Warranty: Does the coverage suit your business?
Support: Can you get technical help when needed?
Electrical requirements: Does your workspace support the machine?
Final Thoughts
A commercial vacuum sealer with double seal can be a useful choice for businesses that want an additional sealing line in their packaging process.
The biggest mistake is to focus only on the phrase “double seal.”
The machine still needs to match your products and workload.
Start by calculating how many packages you seal each day.
Measure your bags and largest products.
Check the seal-bar length.
Look at chamber dimensions if you are considering a chamber model.
Compare pump specifications, cycle time, and duty cycle.
Then check bag compatibility, cleaning requirements, replacement parts, warranty, and service support.
Once you install the machine, create a simple routine:
Prepare → Portion → Bag → Vacuum → Double Seal → Inspect → Label → Store
Train every employee to follow the same process.
Keep the bag opening clean.
Inspect both sealing lines.
Clean the machine regularly.
Maintain it according to the manufacturer’s instructions.
And continue following the food-handling, refrigeration, freezing, sanitation, and labeling rules that apply to your business.
A double seal can add another layer of package closure, but the best results come from the complete system: the right machine, the right bag, the right settings, and careful handling.
Content Disclaimer: Content on Vacuum Seal HQ is provided for general informational and educational purposes only. While we aim to provide accurate and up-to-date information, errors or omissions may occur. Always check product instructions, manufacturer guidance and other appropriate sources before relying on the information provided.